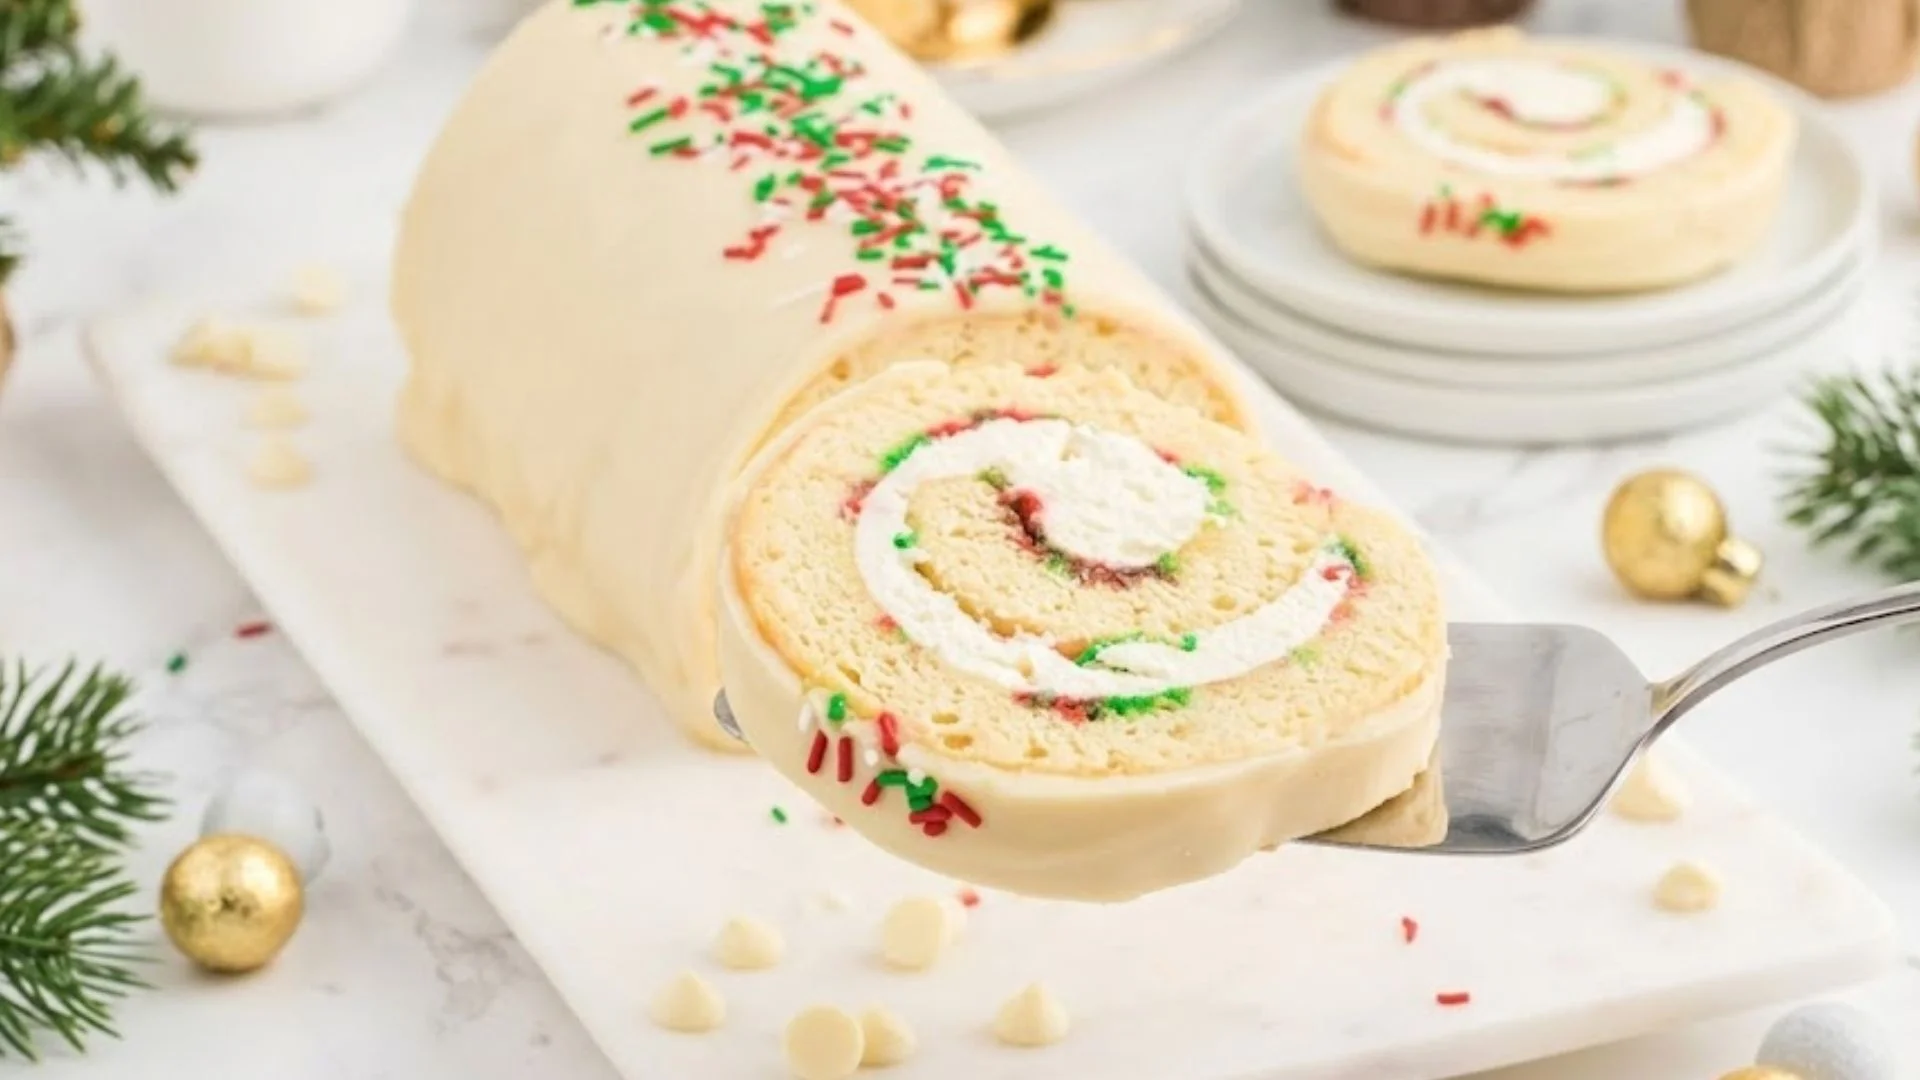
Christmas Vanilla Roll Cake has a tender vanilla sponge wrapped around rich almond buttercream, then topped with silky white chocolate and colorful holiday sprinkles.
The snowy glaze and festive decoration make the dessert look especially inviting on a Christmas table. I found that the hardest part was rolling the sponge before it cooled too much, since a firm cake can split along the edges.
A warm roll and gentle handling solved that problem for me. The ingredients are easy to find, so I can prepare this Christmas vanilla roll cake at home for a reasonable cost. The full process takes about 1 hour 45 minutes, including cooling and chilling time.
About This Christmas Vanilla Roll Cake
Christmas Vanilla Roll Cake is a festive baked dessert featuring a light sponge, creamy buttercream center, and smooth white chocolate topping.
The Christmas vanilla roll cake tastes sweet, buttery, and gently nutty from almond extract, while the sponge stays soft and flexible. White chocolate gives the topping a creamy finish, and colorful sprinkles add a cheerful holiday touch.
I like making this Christmas vanilla roll cake because the ingredients are familiar and the finished roll looks impressive. The main challenge is preventing cracks during rolling, so keeping the sponge warm during the first roll helps maintain its shape.
Recipe Overview
Prep Time: 30 minutes
Cooking Time: 15 minutes
Cooling & Assembly Time: 1 hour
Total Time: About 1 hour 45 minutes
Course: Dessert
Cuisine: American
Cooking Style: Baking
Recipe Type: Holiday Cake
Main Ingredient: All-purpose flour
Best Served: Chilled or slightly cool
Recipe Yield: 10 slices
Serving Size: 1 slice
Main Kitchen Utensils
- 10 × 15-inch jelly-roll pan
- Parchment paper
- Large mixing bowls
- Electric hand or stand mixer
- Fine-mesh sieve
- Rubber spatula
- Offset spatula
- Clean kitchen towel
- Wire cooling rack
- Small microwave-safe bowl
- Sharp serrated knife
Ingredients
Vanilla Sponge
- 4 large eggs, separated and brought to room temperature
- ⅔ cup all-purpose flour
- 1 teaspoon baking powder
- ½ teaspoon almond extract
- ⅛ teaspoon salt
- 2 tablespoons whole milk
- 1 teaspoon white vinegar
- ⅔ cup granulated sugar, divided
- 1 teaspoon pure vanilla extract
- 2 tablespoons red and green holiday sprinkles
- ⅓ cup powdered sugar for dusting
Buttercream Filling
- 3 tablespoons heavy cream
- 2 tablespoons red and green holiday sprinkles
- 3 tablespoons vegetable shortening
- 6 tablespoons salted sweet cream butter, softened
- 1¾ cups powdered sugar
- ½ teaspoon almond extract
- 1 teaspoon clear vanilla flavor
White Chocolate Glaze
- 4 ounces white chocolate baking bar, chopped
- 3 tablespoons heavy cream
- ½ cup powdered sugar
Instructions
Step 1
Heat the oven to 350°F (175°C). Line a 10 × 15-inch jelly-roll pan with parchment paper and lightly grease the paper.
Step 2
Place the yolks in one bowl and the whites in another clean bowl. Make sure no yolk gets into the whites.
Step 3
Beat the whites until foamy, then add the vinegar. Gradually beat in half of the sugar until the mixture forms firm, glossy peaks.
Step 4
Beat the yolks, remaining sugar, vanilla, almond extract, and milk until pale and slightly thickened.
Step 5
Sift the flour, baking powder, and salt over the yolk mixture. Fold gently. Add the whipped whites in several portions, keeping the batter airy. Fold in the holiday sprinkles at the end.
Step 6
Spread the batter evenly in the prepared pan. Bake for about 12–15 minutes, until the center springs back lightly when touched.
Step 7
Dust a clean kitchen towel generously using powdered sugar. Turn the warm cake onto the towel, carefully remove the parchment, then roll the sponge from one short end while it is still warm. Let it cool completely.
Step 8
Beat the softened butter and shortening until creamy. Gradually add the powdered sugar, then mix in the cream, almond extract, and clear vanilla. Stir in the holiday sprinkles.
Step 9
Unroll the cooled sponge carefully. Spread the buttercream across the surface, leaving a small border around the edges. Roll it back up tightly. Melt the chopped white chocolate and cream gently, then whisk in the powdered sugar until smooth. Spoon the glaze over the cake.
Step 10
Refrigerate the finished roll until the filling firms up. Before serving, trim the ends if desired and cut into even slices using a sharp knife. Add a few festive sprinkles on top for decoration.
Nutrition Facts Christmas Vanilla Roll Cake
| Nutrition | Amount |
|---|---|
| Calories | 430 calories |
| Carbohydrates | 55 grams |
| Sugar | 39 grams |
| Protein | 5 grams |
| Total Fat | 22 grams |
| Saturated Fat | 11 grams |
| Cholesterol | 0.15 grams |
| Sodium | 0.18 grams |
| Fiber | 1 gram |
Why It’s Popular
Christmas Vanilla Roll Cake is popular because it looks festive, slices beautifully, and brings several enjoyable textures together. The soft sponge pairs nicely with creamy buttercream and a smooth white chocolate topping.
Red and green sprinkles give the Christmas vanilla roll cake a cheerful holiday appearance that stands out on a dessert table. Many home bakers also appreciate the familiar ingredients and manageable baking time.
The rolled shape makes ordinary vanilla cake feel more special, while the almond and vanilla notes give the dessert a bakery-style touch.
Why I Love It
I love this Christmas vanilla roll cake because the soft sponge feels light, while the buttercream center adds a rich, creamy layer. The almond and vanilla notes give the dessert a gentle sweetness that never feels dull.
I also enjoy the festive look created by the red and green sprinkles and white topping. The rolled shape makes slicing fun and gives the dessert a special homemade character.
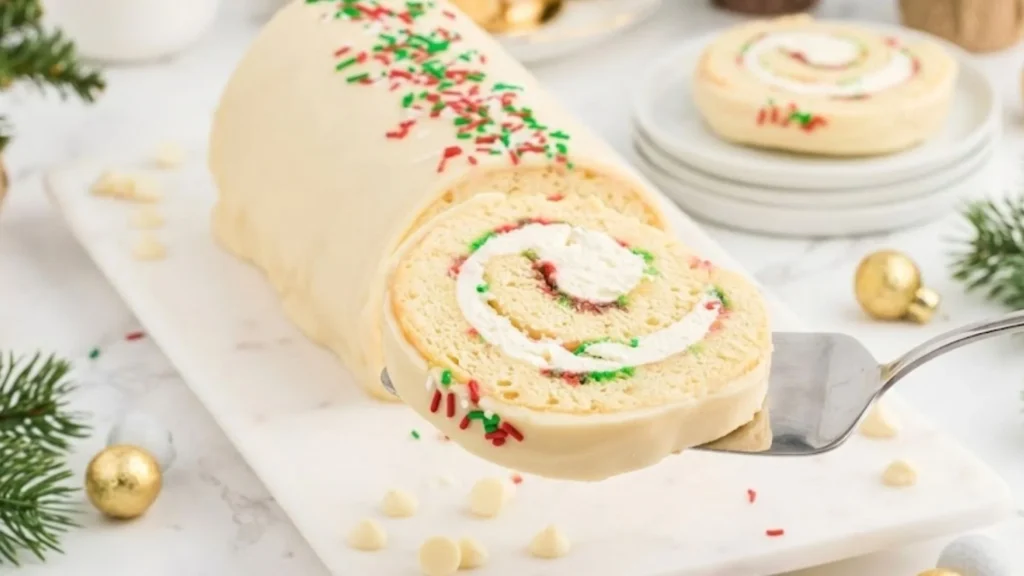
My favorite part is seeing the neat spiral appear after cutting the first slice. It feels festive, homemade, and worth the little extra care needed during rolling.
Professional Baking Tips
1. Spoon flour into the measuring cup and level the top. Excess flour can produce a heavier sponge that bends poorly.
2. Allow the oven to reach the required temperature before placing the pan inside. A stable heat helps the sponge rise evenly.
3. Remove the cake once the center springs back lightly. Too much oven time can dry the sponge and make the edges brittle.
4. Have the powdered-sugar-coated towel ready before the cake leaves the oven. This lets you transfer and roll the sponge promptly.
5. Beat the buttercream until no visible lumps remain. A smooth layer spreads more easily across the sponge.
6. Chop the white chocolate into small pieces before melting. Smaller pieces melt more evenly and help create a smoother glaze.
7. Dip a sharp knife briefly in warm water, dry it thoroughly, then cut the chilled roll. Clean the blade between slices for tidy edges.
How To Serve This Cake
Serve the Christmas vanilla roll cake chilled or let it sit at room temperature briefly before slicing. I like cutting it into neat rounds so the creamy spiral stays visible.
Arrange the slices on a white or festive platter, then scatter a few red and green sprinkles around the edges. A dusting of powdered sugar can add a snowy appearance.
Pair a slice with coffee, hot cocoa, or black tea for a cozy dessert. For Christmas dinner, place the roll near other sweets so guests can choose a smaller portion after their meal.
Best Variations
1. Peppermint White Chocolate Roll
Add ¼ teaspoon peppermint extract to the buttercream and mix in 2 tablespoons crushed peppermint candies. Spread the filling evenly, then finish the glazed cake using another 1 tablespoon crushed candy. The mint brings a cool holiday taste, while the white chocolate keeps the dessert creamy and sweet.
2. Chocolate Vanilla Roll
Replace 2 tablespoons all-purpose flour in the sponge using 2 tablespoons unsweetened cocoa powder. Add ½ teaspoon extra vanilla extract to the filling for a richer vanilla note. The darker sponge creates a beautiful contrast against the pale buttercream when sliced.
3. Strawberry Cream Roll
Spread ⅓ cup strawberry preserves over the sponge before adding the buttercream. Keep about ½ inch around the edges uncovered so the filling stays inside during rolling. Add 2 tablespoons finely chopped freeze-dried strawberries to the buttercream for a stronger berry taste and colorful appearance.
4. Coconut Vanilla Roll
Stir ⅓ cup finely shredded sweetened coconut into the buttercream. After adding the white chocolate glaze, sprinkle ¼ cup toasted coconut across the surface. The coconut gives the center a pleasantly chewy texture and adds a snowy appearance that suits a Christmas dessert.
5. Orange Vanilla Roll
Add 1 tablespoon finely grated orange zest to the sponge batter and ½ teaspoon orange extract to the buttercream. Finish the glaze using 1 teaspoon of additional orange zest scattered lightly over the top. The citrus notes brighten the sweet vanilla center and create a fresh seasonal variation.
How To Store Leftovers
Keep leftover Christmas vanilla roll cake in an airtight container and place it in the refrigerator to keep the buttercream and white chocolate topping fresh.
Try to store the slices in a single layer so the topping stays tidy. For the best taste and texture, eat the cake within 3–4 days. If you need to stack the slices, add parchment paper between them to keep them from sticking.
Before serving, leave a slice at room temperature for 15–20 minutes to soften the buttercream. Always keep the Christmas vanilla roll cake covered so the sponge does not dry out.
FAQs About Christmas Vanilla Roll Cake
Why did my Christmas Vanilla Roll Cake crack?
Cracking can happen if the sponge is overbaked or becomes too cool before rolling. Rolling the cake while it is still warm helps the sponge develop a flexible shape. A gentle touch during rolling also reduces the chance of breaks.
Can I make this roll cake a day ahead?
Yes. Prepare the cake, filling, and glaze, then refrigerate it in a covered container. Keeping it chilled helps the buttercream stay firm and makes slicing easier when you are ready to serve.
Can I use chocolate chips instead of a white chocolate baking bar?
A white chocolate baking bar is the better choice for this glaze because it melts smoothly. Chocolate chips may contain stabilizers that can make the glaze thicker or less silky after heating.
How do I get a neat spiral inside the cake?
Spread the buttercream in an even layer, leaving a small border around the edges. Roll from one short end while keeping steady pressure. Avoid pressing too firmly, as this can push the filling toward the sides.
Can I change the Christmas sprinkle colors?
Yes. Use any small seasonal sprinkles you prefer. Red, green, gold, silver, or white decorations can all work nicely. Smaller pieces are preferable because they are easier to roll into the sponge.
Conclusion
Christmas vanilla roll cake brings a festive finish to the holiday table through its tender sponge, creamy center, and white chocolate topping.
The colorful sprinkles give the finished dessert a cheerful appearance, while almond and vanilla notes add a gentle sweetness.
I especially enjoy slicing the chilled roll and seeing the neat spiral inside. The Christmas Vanilla Roll Cake does require some care during rolling, but the result makes that extra attention worthwhile.
Prepare it ahead of your gathering, keep the slices chilled, and serve them once the filling has softened slightly. This homemade Christmas vanilla roll cake makes a lovely addition to Christmas celebrations.
Christmas Vanilla Roll Cake

Equipment
- 10 × 15-inch jelly-roll pan
- parchment paper,
- Large mixing bowls
- Electric hand or stand mixer
- Fine mesh sieve
- Rubber spatula
- offset spatula
- Clean kitchen towel
- Wire cooling rack
- Small microwave-safe bowl
- Sharp serrated knife
Ingredients
Vanilla Sponge
- 4 large eggs separated and brought to room temperature
- ⅔ cup all-purpose flour
- 1 teaspoon baking powder
- ½ teaspoon almond extract
- ⅛ teaspoon salt
- 2 tablespoons whole milk
- 1 teaspoon white vinegar
- ⅔ cup granulated sugar divided
- 1 teaspoon pure vanilla extract
- 2 tablespoons red and green holiday sprinkles
- ⅓ cup powdered sugar for dusting
Buttercream Filling
- 3 tablespoons heavy cream
- 2 tablespoons red and green holiday sprinkles
- 3 tablespoons vegetable shortening
- 6 tablespoons salted sweet cream butter softened
- 1¾ cups powdered sugar
- ½ teaspoon almond extract
- 1 teaspoon clear vanilla flavor
White Chocolate Glaze
- 4 ounces white chocolate baking bar chopped
- 3 tablespoons heavy cream
- ½ cup powdered sugar
Instructions
Step 1
- Heat the oven to 350°F (175°C). Line a 10 × 15-inch jelly-roll pan with parchment paper and lightly grease the paper.
Step 2
- Place the yolks in one bowl and the whites in another clean bowl. Make sure no yolk gets into the whites.
Step 3
- Beat the whites until foamy, then add the vinegar. Gradually beat in half of the sugar until the mixture forms firm, glossy peaks.
Step 4
- Beat the yolks, remaining sugar, vanilla, almond extract, and milk until pale and slightly thickened.
Step 5
- Sift the flour, baking powder, and salt over the yolk mixture. Fold gently. Add the whipped whites in several portions, keeping the batter airy. Fold in the holiday sprinkles at the end.
Step 6
- Spread the batter evenly in the prepared pan. Bake for about 12–15 minutes, until the center springs back lightly when touched.
Step 7
- Dust a clean kitchen towel generously using powdered sugar. Turn the warm cake onto the towel, carefully remove the parchment, then roll the sponge from one short end while it is still warm. Let it cool completely.
Step 8
- Beat the softened butter and shortening until creamy. Gradually add the powdered sugar, then mix in the cream, almond extract, and clear vanilla. Stir in the holiday sprinkles.
Step 9
- Unroll the cooled sponge carefully. Spread the buttercream across the surface, leaving a small border around the edges. Roll it back up tightly. Melt the chopped white chocolate and cream gently, then whisk in the powdered sugar until smooth. Spoon the glaze over the cake.
Step 10
- Refrigerate the finished roll until the filling firms up. Before serving, trim the ends if desired and cut into even slices using a sharp knife. Add a few festive sprinkles on top for decoration.
Hello and welcome to All Recipe Make! I’m Julia, the creator behind this food and lifestyle blog, and I’m so glad you’re here. With four years of experience developing recipes, I love crafting dishes that are delicious, fun, and nourishing. Here, you’ll discover a wide range of recipes from vegan and gluten-free options to simple, budget-friendly meals. My aim is to help you bring something special to your table without spending a fortune. Thanks for stopping by I hope you enjoy exploring these recipes as much as I enjoy creating and sharing them!