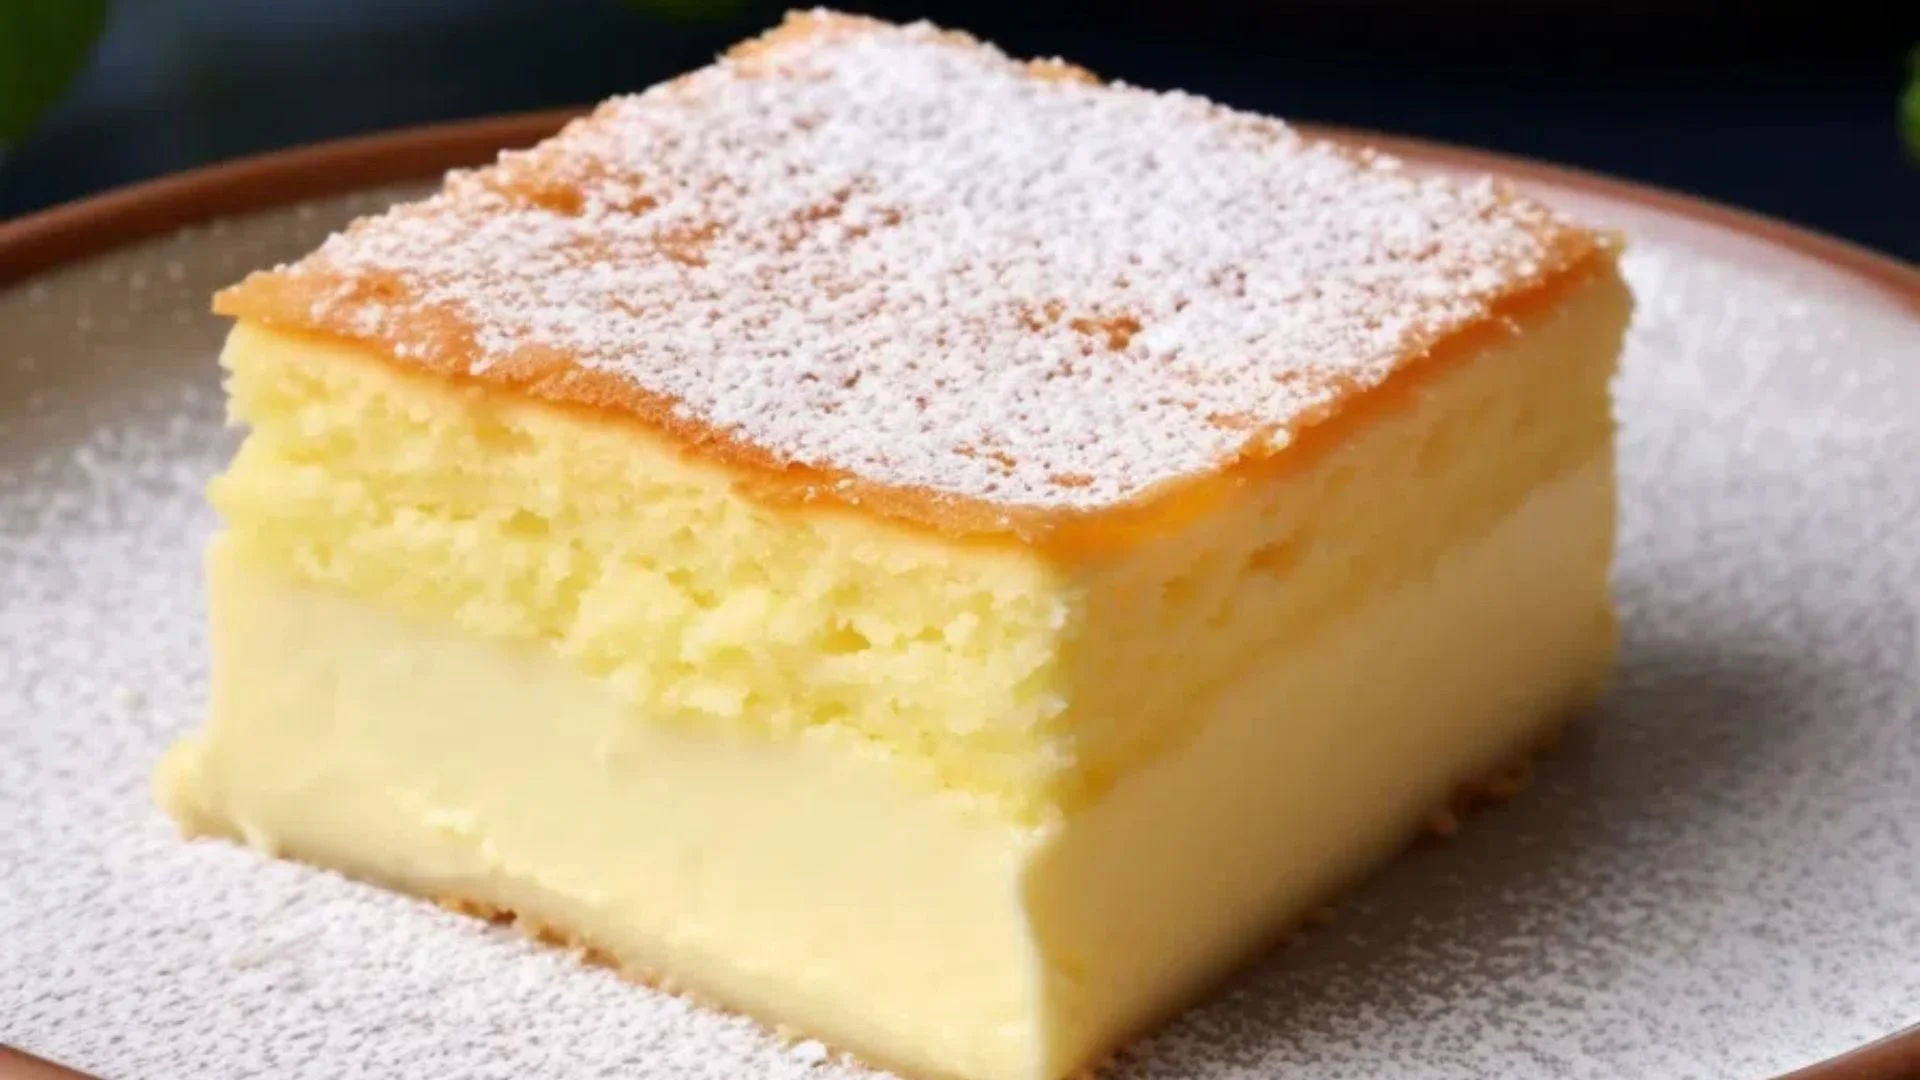
Magic vanilla cake recipe amazed me the first time I baked it. This recipe creates three beautiful layers from one batter. My biggest challenge was trusting the thin mixture, because it looked too runny.
I followed the mixing order patiently and baked it gently, allowing the layers to form naturally. The top becomes light, the center turns creamy, and the bottom stays soft. Delicate vanilla taste, silky custard, and tender cake make this dessert memorable.
Below I share my method from start to finish so anyone can enjoy the same delightful homemade result every time confidently.
About This Magic Vanilla Cake Recipe
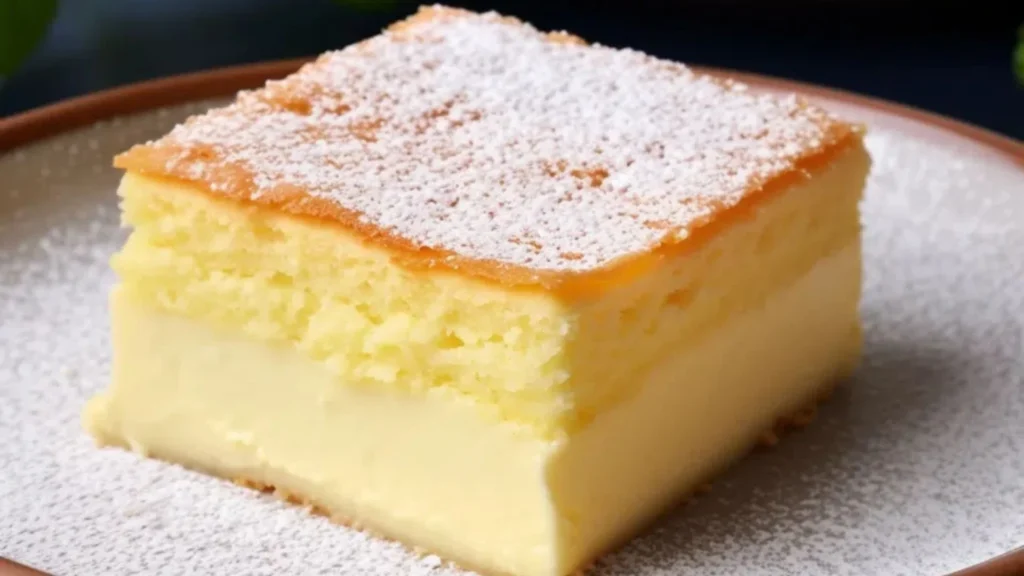
Magic vanilla cake recipe is a delightful dessert that transforms into three beautiful layers while baking from a single batter. The top is light and airy, the center is smooth and creamy, and the bottom is soft and custard-like.
Gentle vanilla taste brings warmth without being too sweet, making every slice enjoyable. The delicate texture melts softly in the mouth and pairs wonderfully with a light dusting of powdered sugar.
This homemade magic vanilla cake recipe looks elegant, slices neatly after chilling, and makes a wonderful treat for family gatherings or afternoon dessert.
How To Prepare Magic Vanilla Cake Recipe?
Creating this magic vanilla cake recipe is easier than it looks. I explain every stage clearly so you can achieve the signature three layers with confidence.
I also include the kitchen tools I use, though basic equipment works well too. Follow the method carefully, and you’ll enjoy a beautifully layered homemade dessert with wonderful results.
Recipe Overview
Preparation Time: 20 minutes
Cooking Time: 60 minutes
Total Time: 1 hour 20 minutes
Course: Dessert
Cuisine: European
Cooking Style: Baking
Dish Type: Cake
Season: Spring, Summer, Fall, Winter
Servings: 1 slice
Recipe Yield: One 8×8-inch cake
Kitchen Utensils
- 8×8-inch baking pan
- Mixing bowls
- Electric hand mixer or stand mixer
- Whisk
- Rubber spatula
- Measuring cups
- Measuring spoons
- Fine mesh sieve
- Cooling rack
Ingredients
- Cooking spray, for greasing the baking pan
- 2 cups whole milk, half-and-half, or light cream
- 4 large egg yolks
- 4 large egg whites, at room temperature
- ½ cup unsalted butter, melted
- ¾ cup granulated sugar
- 2 tablespoons cold water
- 2 teaspoons vanilla extract or vanilla bean paste
- ⅛ teaspoon fine salt
- ¾ cup all-purpose flour
- ¼ cup powdered sugar, for dusting
Instructions
Step 1
Preheat the oven to 325°F (163°C). Lightly coat an 8×8-inch baking pan with cooking spray. Set the pan aside while preparing the batter.
Step 2
Whisk the egg yolks, granulated sugar, and cold water until the mixture becomes pale and creamy. Stir in the melted butter, vanilla extract, and salt. Add the flour gradually, then slowly pour in the milk while whisking until the batter is smooth.
Step 3
Using a clean bowl, beat the egg whites until stiff peaks form. The egg whites should hold their shape but still look glossy.
Step 4
Gently fold the whipped egg whites into the batter in several additions. Small lumps of egg white are completely normal and help create the cake’s signature layers.
Step 5
Pour the batter into the prepared baking pan. Bake for 50 to 60 minutes, or until the top is lightly golden and the center has a slight jiggle when gently shaken.
Step 6
Allow the cake to cool completely in the pan. Refrigerate for at least 2 hours before slicing for the cleanest layers. Dust generously with powdered sugar before serving.
Nutrition Facts Of Magic Vanilla Cake Recipe
| Nutrition | Amount |
|---|---|
| Calories | 240 calories |
| Carbohydrates | 24 grams |
| Protein | 6 grams |
| Total Fat | 13 grams |
| Saturated Fat | 7 grams |
| Sugar | 18 grams |
| Fiber | 0 grams |
| Sodium | 0.80 grams |
| Cholesterol | 0.12 grams |
What Makes This Magic Vanilla Cake Special
This magic vanilla cake recipe is special because a single batter naturally separates into three distinct layers while baking. The soft base, creamy custard center, and delicate sponge top create a beautiful contrast in texture without extra work.
Simple pantry ingredients produce an elegant homemade dessert that looks impressive when sliced. The rich vanilla taste, smooth consistency, and lightly golden surface make every piece memorable.
After chilling, the layers become even more defined, giving the cake a refined appearance and a delicious texture that makes magic vanilla cake recipe stand out from traditional vanilla cakes.
How It Works
Magic Vanilla Cake begins as one thin batter made from eggs, milk, butter, sugar, flour, and vanilla. Whipped egg whites are gently folded into the mixture, leaving small pockets of air that help create the light top layer.
During baking, the ingredients naturally separate because of their different densities. The sponge rises to the top, the creamy custard settles in the middle, and the soft pudding layer forms at the bottom.
Allowing the cake to cool completely and chill before slicing helps the layers become firm, smooth, and beautifully defined.
Expert Tips And Tricks
1. Use room temperature egg whites so they whip into stiff peaks more easily and create a lighter top layer.
2. Warm the milk slightly before adding it to the batter. Hot milk can affect the egg mixture, while cold milk may not blend as smoothly.
3. Fold the whipped egg whites gently into the batter. Small lumps of egg white are normal and help create the signature layered texture.
4. Bake at a steady low temperature without opening the oven door during baking to allow the layers to develop properly.
5. Let the cake cool completely, then refrigerate it for at least 2 hours before slicing for clean, neat pieces.
6. Dust the cake with powdered sugar just before serving to keep the topping fresh and give the dessert a beautiful finish.
Serving Suggestions
Magic vanilla cake recipe is delicious served well chilled, allowing the three delicate layers to hold their shape beautifully. I like to finish each slice with a light dusting of powdered sugar and fresh berries for a colorful presentation.
It also pairs wonderfully with fresh sliced peaches, cherries, or a spoonful of lemon curd for a bright finish. For a richer dessert, serve it with a scoop of vanilla ice cream or a dollop of lightly whipped cream.
A cup of hot coffee, black tea, or creamy hot chocolate completes the experience and makes this magic vanilla cake recipe feel extra comforting.
Health Benefits
Magic vanilla cake recipe is a homemade dessert that lets you enjoy a sweet treat made from simple ingredients. Milk provides calcium and protein that support healthy bones and muscles, while eggs contribute high quality protein along with essential vitamins and minerals.
Butter adds richness and supplies fat that helps create the cake’s tender texture. Preparing this dessert at home gives you control over the ingredients and portion sizes.
Enjoying a moderate slice as part of a balanced diet can make this classic vanilla cake a delightful dessert without overindulging.
Ways To Make Additions Extra Delicious
➤ Top each slice with fresh strawberries, blueberries, or raspberries for a naturally sweet and colorful finish.
➤ Add a dollop of lightly whipped cream to create an even creamier dessert without overpowering the delicate vanilla taste.
➤ Sprinkle toasted sliced almonds or chopped pistachios over the cake for a pleasant crunch and a beautiful presentation.
➤ Serve with a spoonful of homemade berry sauce, lemon curd, or warm fruit compote to add a bright, fruity touch.
➤ Garnish with white chocolate shavings or a light dusting of cinnamon for an elegant finishing touch that makes every slice look bakery worthy.
Storage
Allow the magic vanilla cake recipe to cool completely before storing. Place the slices in an airtight container or cover the baking pan tightly with plastic wrap or aluminum foil.
Keep the cake refrigerated for up to 4 days to maintain its creamy texture and fresh taste. Serve chilled or let a slice sit at room temperature for about 10 minutes before enjoying.
For longer storage, wrap individual slices securely and freeze for up to 2 months. Defrost in the refrigerator until fully chilled before serving.
(FAQs) About Magic Vanilla Cake Recipe
Why does the cake shrink after baking?
The cake doesn’t rise like regular cakes. It may shrink as it cools because the top layer is light and delicate, and settling is normal.
Can I use a different pan shape?
Yes, you can use round or other pans, but ensure they are lined well so the thin batter doesn’t leak. Taller parchment edges help when lifting the cake out later.
What’s the best way to get clean slices?
Cooling the cake fully and chilling in the fridge helps the layers firm up, making slicing neater. Use a sharp knife wiped clean between cuts.
Is it normal for the cake to shrink after baking?
Yes, this type of cake doesn’t rise like traditional cakes and may settle back after baking; that’s expected because of its custard‑like texture.
Can flavors be added?
Yes. You can add citrus zest, almond or cinnamon optionally to change the basic vanilla flavor.
Conclusion
Magic vanilla cake recipe brings together ordinary pantry ingredients to create an elegant dessert featuring three beautiful layers after baking.
The creamy base, silky middle, and light sponge top make this homemade magic vanilla cake recipe memorable from the first slice to the last.
I hope this magic vanilla cake recipe inspires you to bake this delightful cake in your own kitchen and enjoy sharing it with family and friends.
If you try this magic vanilla cake recipe, please leave a comment and give it a rating to share your experience. Visit my collection for more delicious homemade cake recipes and delightful dessert inspiration.
More Amazing Delicious Recipes
Comfort Old-Fashioned Chocolate Cake
Original Chocolate Mayonnaise Cake – A Delicious Surprise
Sally’s Chocolate Cake (A Rich Delight)
Bacon And Cheese Bread || Comfort Food Recipe
Magic Vanilla Cake Recipe

Equipment
- 8×8 inch baking pan
- Mixing bowls
- Electric hand mixer or stand mixer
- Whisk
- Rubber spatula
- Measuring Cups
- Measuring spoons
- Fine mesh sieve
- Cooling rack
Ingredients
- Cooking spray for greasing the baking pan
- 2 cups whole milk half-and-half, or light cream
- 4 large egg yolks
- 4 large egg whites at room temperature
- ½ cup unsalted butter melted
- ¾ cup granulated sugar
- 2 tablespoons cold water
- 2 teaspoons vanilla extract or vanilla bean paste
- ⅛ teaspoon fine salt
- ¾ cup all-purpose flour
- ¼ cup powdered sugar for dusting
Instructions
Step 1
- Preheat the oven to 325°F (163°C). Lightly coat an 8×8-inch baking pan with cooking spray. Set the pan aside while preparing the batter.
Step 2
- Whisk the egg yolks, granulated sugar, and cold water until the mixture becomes pale and creamy. Stir in the melted butter, vanilla extract, and salt. Add the flour gradually, then slowly pour in the milk while whisking until the batter is smooth.
Step 3
- Using a clean bowl, beat the egg whites until stiff peaks form. The egg whites should hold their shape but still look glossy.
Step 4
- Gently fold the whipped egg whites into the batter in several additions. Small lumps of egg white are completely normal and help create the cake’s signature layers.
Step 5
- Pour the batter into the prepared baking pan. Bake for 50 to 60 minutes, or until the top is lightly golden and the center has a slight jiggle when gently shaken.
Step 6
- Allow the cake to cool completely in the pan. Refrigerate for at least 2 hours before slicing for the cleanest layers. Dust generously with powdered sugar before serving.
Notes
Nutrition Facts Of Magic Vanilla Cake Recipe
Calories: 240 calories | Carbohydrates: 24 grams | Protein: 6 grams | Total Fat: 13 grams | Saturated Fat: 7 grams | Sugar: 18 grams | Fiber: 0 g grams | Sodium: 0.80 grams | Cholesterol: 0.12 gramsHello and welcome to All Recipe Make! I’m Julia, the creator behind this food and lifestyle blog, and I’m so glad you’re here. With four years of experience developing recipes, I love crafting dishes that are delicious, fun, and nourishing. Here, you’ll discover a wide range of recipes from vegan and gluten-free options to simple, budget-friendly meals. My aim is to help you bring something special to your table without spending a fortune. Thanks for stopping by I hope you enjoy exploring these recipes as much as I enjoy creating and sharing them!